Improving the Tail Rigging
Reinforcing the rigging harness
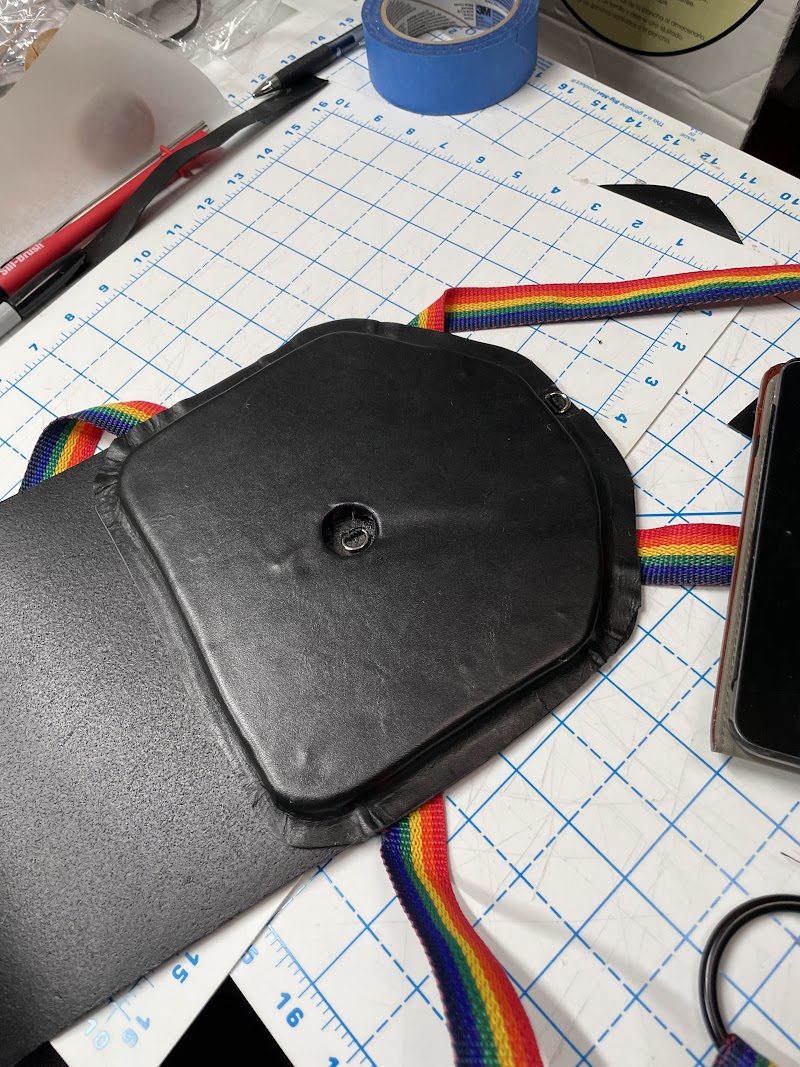
I needed to stiffen the tail support across the shoulder blades because even the heavy hide I used was too flexible. Fortunately I’ve acquired a healthy set of power tools in the course of working on my townhouse and building both Tiki Dalek and Thinbot, so it only took about 20 minutes to craft one out of some 1/4″ plywood (left over from building Tiki Dalek!).
I attached it through the leather with some wood screws, ground off the pointy tips, then covered the hole thing with some lighter weight leather so the surface is smooth and there are no slivers to snag on the inside of the fursuit.
to attach the tail at the base, I shortened a plastic separating zipper to be just 5″ long, stitched one half near the bottom of the harness plate, and the other half to the piece of leather I’d sewn into the base of the tail. (this way the harness is supporting the weight rather than the faux fur of the fursuit).
Finally, I stitched a 7″ zipper inside the suit, perpendicular to the back seam at the base of my spine, combed all the fur pile free of the stitching, then unzipped the zipper and carefully cut a slit in the fur backing, for that leather tab to come through from the tail. This was done with the green and purple mockup suit for testing.
Taking it for a test run (with the mockup suit)
A test of the tail rigging with the mockup suit gave very happy results… so the next step will be to add the tail port zipper to the grey “hero” suit. (“Hero” in the sense of the high-quality version of a film prop intended for closer-up camera work)
It’s Magic!
I ordered a little collapsible projector stand and a fringed scarf to create the magician’s table for Bullwinkle’s top hat


