

It’s a head!
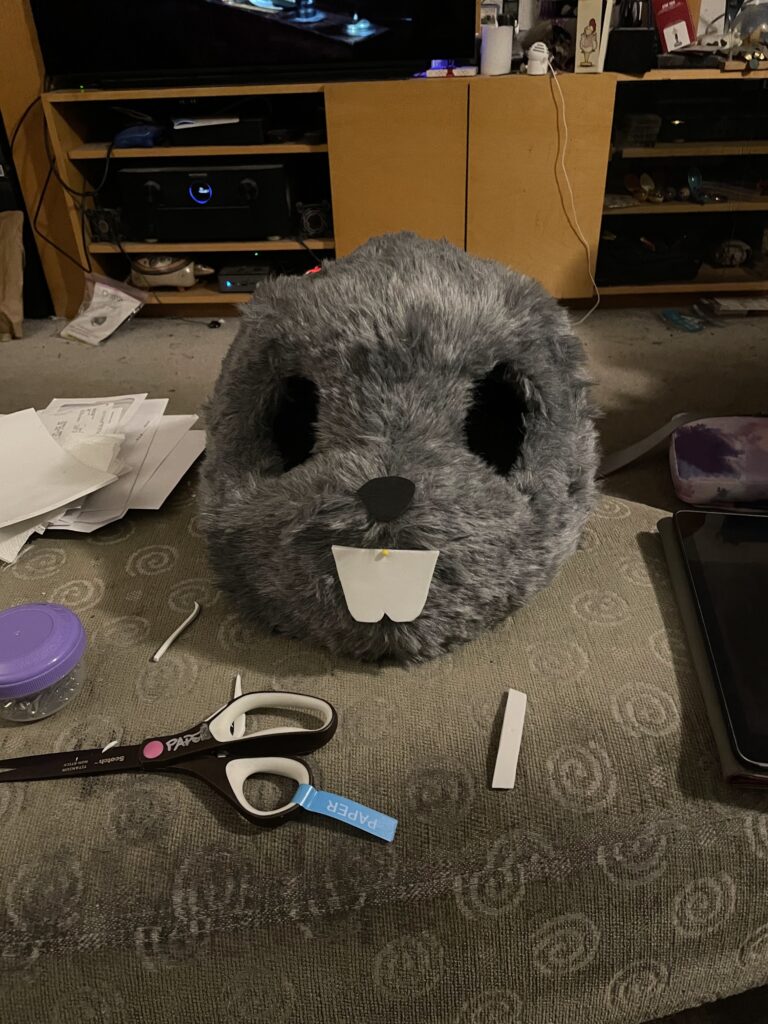
Here’s how Rocky’s head looks after assembling and doing a first shave on the furring.
The fur is not yet glued to the head, and the nose and teeth are just pinned on.
Fur also needs to be trimmed back from the eyeholes slightly.

Here’s how Rocky’s head looks after assembling and doing a first shave on the furring.
The fur is not yet glued to the head, and the nose and teeth are just pinned on.
Fur also needs to be trimmed back from the eyeholes slightly.

I got all the final bits finished in time, and here are some fabulous photos from Gallifrey One!(Most of these are courtesy of Linda Wenzelburger… Thanks!)

Over the weekend I got almost all the main assembly done for both skulls (there’s one final piece that extends off the back of the mask) and did an initial pass at shaping all those square foam edges with a tapered grinding stone on my Dremel mototool. (the regular kind of Dremel, not the coping…

Just a few snaps from the audience from my performance of “Pink Pony Club” in my Pinky-Pie inspired wardrobe.I’m hoping for some with better white balance in the near future. My friend Christine also recorded a video, but I haven’t processed and uploaded it yet.

(Transcribed from a comment I made on Bill Howard’s FB page)

Bill will be adding details of his Bullwinkle build as time and opportunity present

The next step was to take a (fraction of a) bucket of foam clay to fillet the seams and add more organic shape to the already sanded skulls. We were going back and forth a lot to SKS Props YouTube video.Andy and I continued to work on one skull each so it will acquire some…